
1. הקדמה
This manual provides comprehensive instructions for the installation, operation, and maintenance of your LUX Pro PSD010B Mechanical Non-Programmable Thermostat. This thermostat is designed for use with 1 Heat Only systems, including fireplaces, stoves, and in-floor radiant heating. It does not require a fan switch and is battery-powered for reliable operation.

בילד 1.1: פראָנט view of the LUX Pro PSD010B Thermostat, displaying a temperature of 72 degrees Fahrenheit on its digital screen, along with up and down arrow buttons for temperature adjustment.
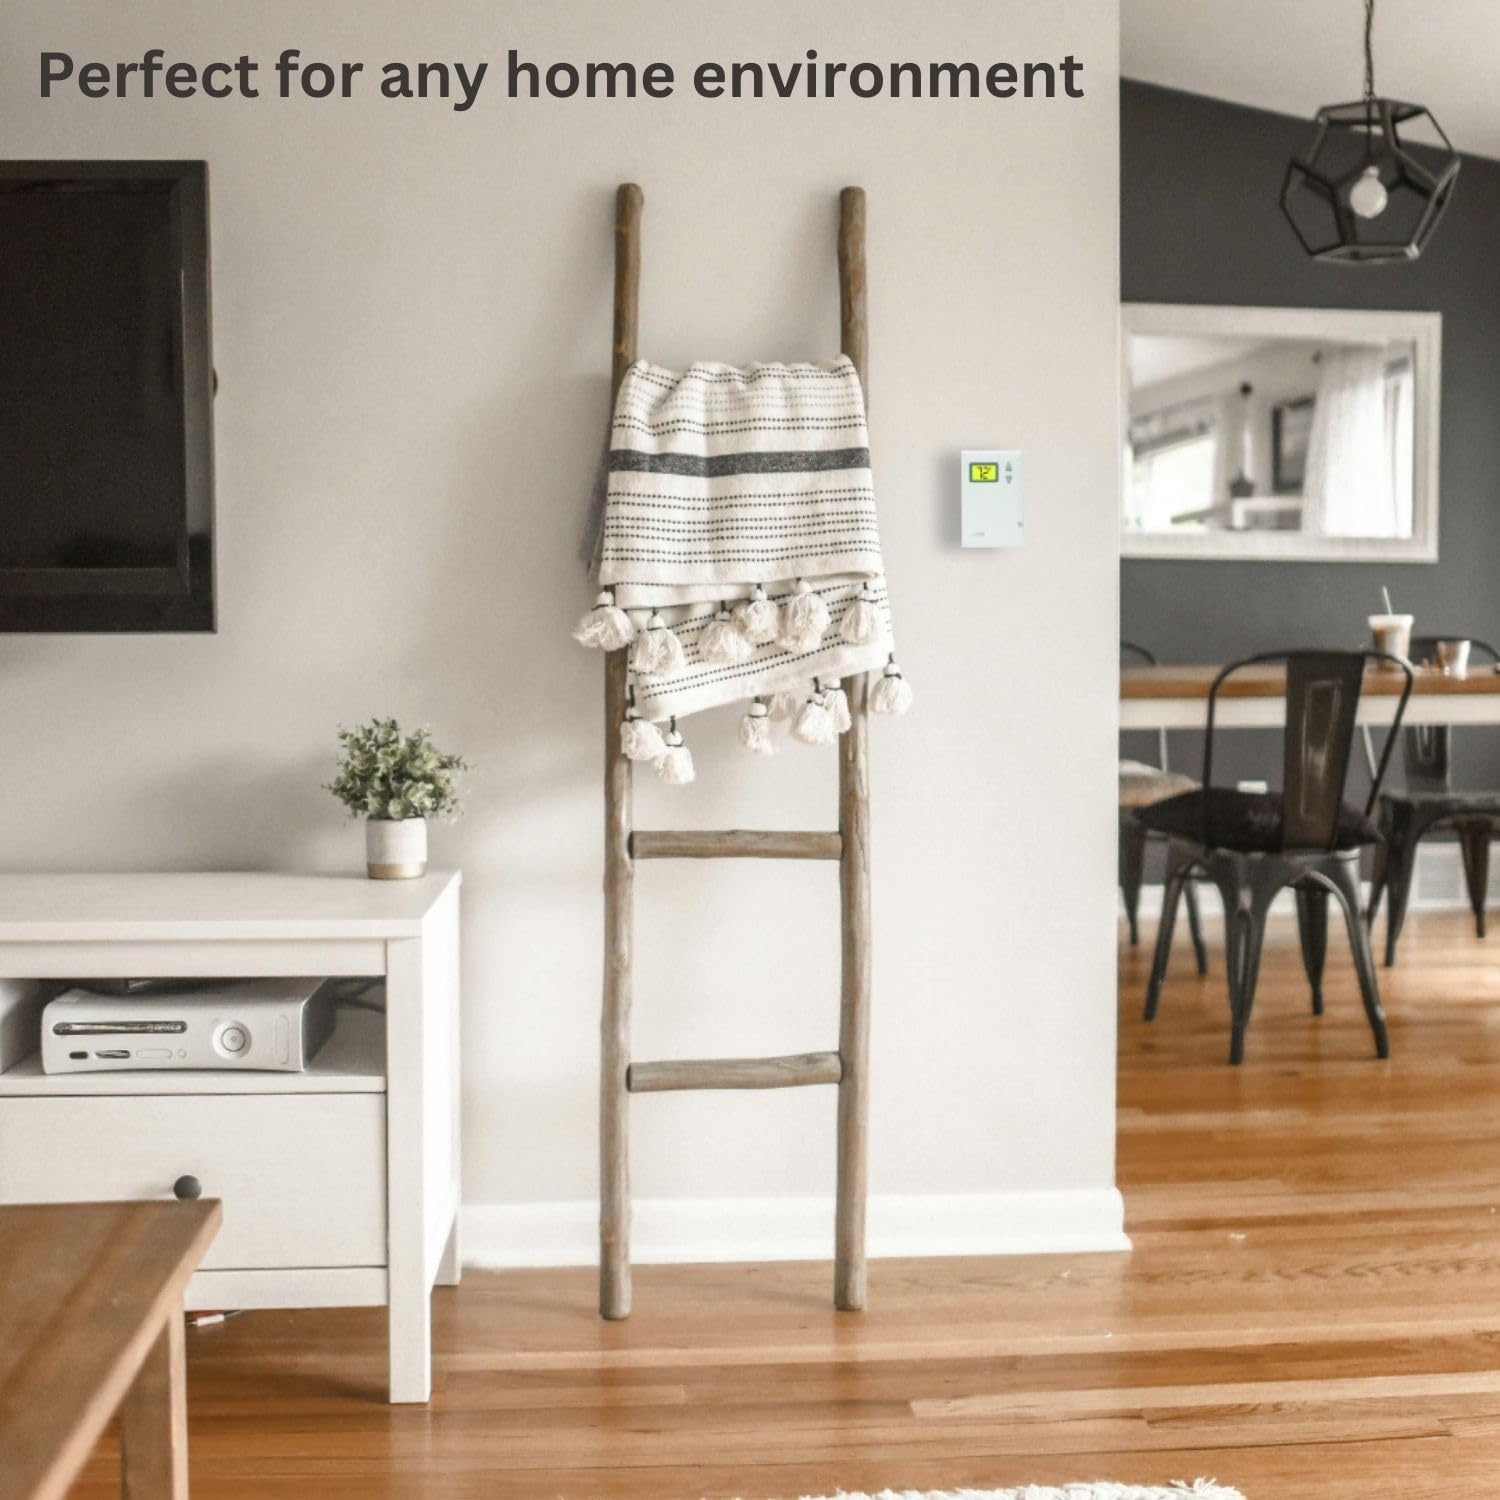
בילד 1.2: The LUX Pro PSD010B Thermostat mounted on a wall in a contemporary living room, demonstrating its discreet integration into a home environment.
2. זיכערקייַט אינפֿאָרמאַציע
- Always turn off power to the heating system at the main fuse or circuit breaker panel before installing or servicing the thermostat.
- This thermostat is designed for low voltage (24V) heating systems or millivolt systems. Do not use with line voltage (120V/240V) סיסטעמען.
- זיכער מאַכן אַז אַלע וויירינג קאַנעקשאַנז זענען זיכער און אין לויט מיט די לאָקאַלע עלעקטרישע קאָודז.
- Dispose of batteries according to local regulations. Do not incinerate batteries.
3. פּעקל אינהאַלט
באַשטעטיקן אַז דיין פּעקל כּולל די פאלגענדע זאכן:

בילד 3.1: Visual representation of the items included in the product box: the PSD010B thermostat, two AA LR6 batteries, two ST screws, two wall anchors, and wire labels.
- LUX Pro PSD010B Thermostat
- 2 AA LR6 Batteries
- 2 Mounting Screws (ST screws)
- 2 וואנט אַנגקערז
- ווירע לאַבעלס
- ינסטרוקטיאָן מאַנואַל (דעם דאָקומענט)
4. ינסטאַלירונג
4.1 פאַר-ינסטאַללאַטיאָן טשעקליסט
- Ensure your heating system is compatible (see Section 6: System Compatibility).
- Gather necessary tools: Phillips screwdriver, wire strippers (if needed), drill (if installing wall anchors).
- Turn off power to your heating system at the circuit breaker or fuse box.
4.2 אַראָפּנעמען דיין אַלטן טערמאָסטאַט
- Turn off the power to your heating system.
- אַראָפּנעמען די דעקל פון דיין אַלט טערמאַסטאַט.
- Note the wire connections. This thermostat is designed for 2-wire heat-only systems. Label the wires (e.g., R and W) using the provided wire labels.
- Disconnect the wires and remove the old thermostat base from the wall.
4.3 Mounting the New Thermostat
- Separate the front cover from the thermostat base.
- Position the thermostat base on the wall where the old thermostat was located. Ensure it is level.
- Mark the mounting holes. If new holes are required, drill pilot holes and insert wall anchors if mounting into drywall.
- באַפֿעסטיקן די טערמאָסטאַט באַזע צו דער וואַנט מיט די צוגעשטעלטע שרויפֿן.
4.4 וויירינג
The PSD010B is compatible with 2-wire heat-only systems. Connect the wires from your heating system to the terminals on the thermostat base. Typically, these are R (power) and W (heat call) wires. Ensure connections are tight.
4.5 באַטאַרייע ייַנמאָנטירונג
- Insert the two AA batteries into the battery compartment on the back of the thermostat, observing the correct polarity (+/-).
- קניפּ די פראָנט דעקל אויף די טערמאָסטאַט באַזע.
- Restore power to your heating system at the main fuse or circuit breaker panel.
5. אָפּעראַציע
5.1 Display and Controls Overview
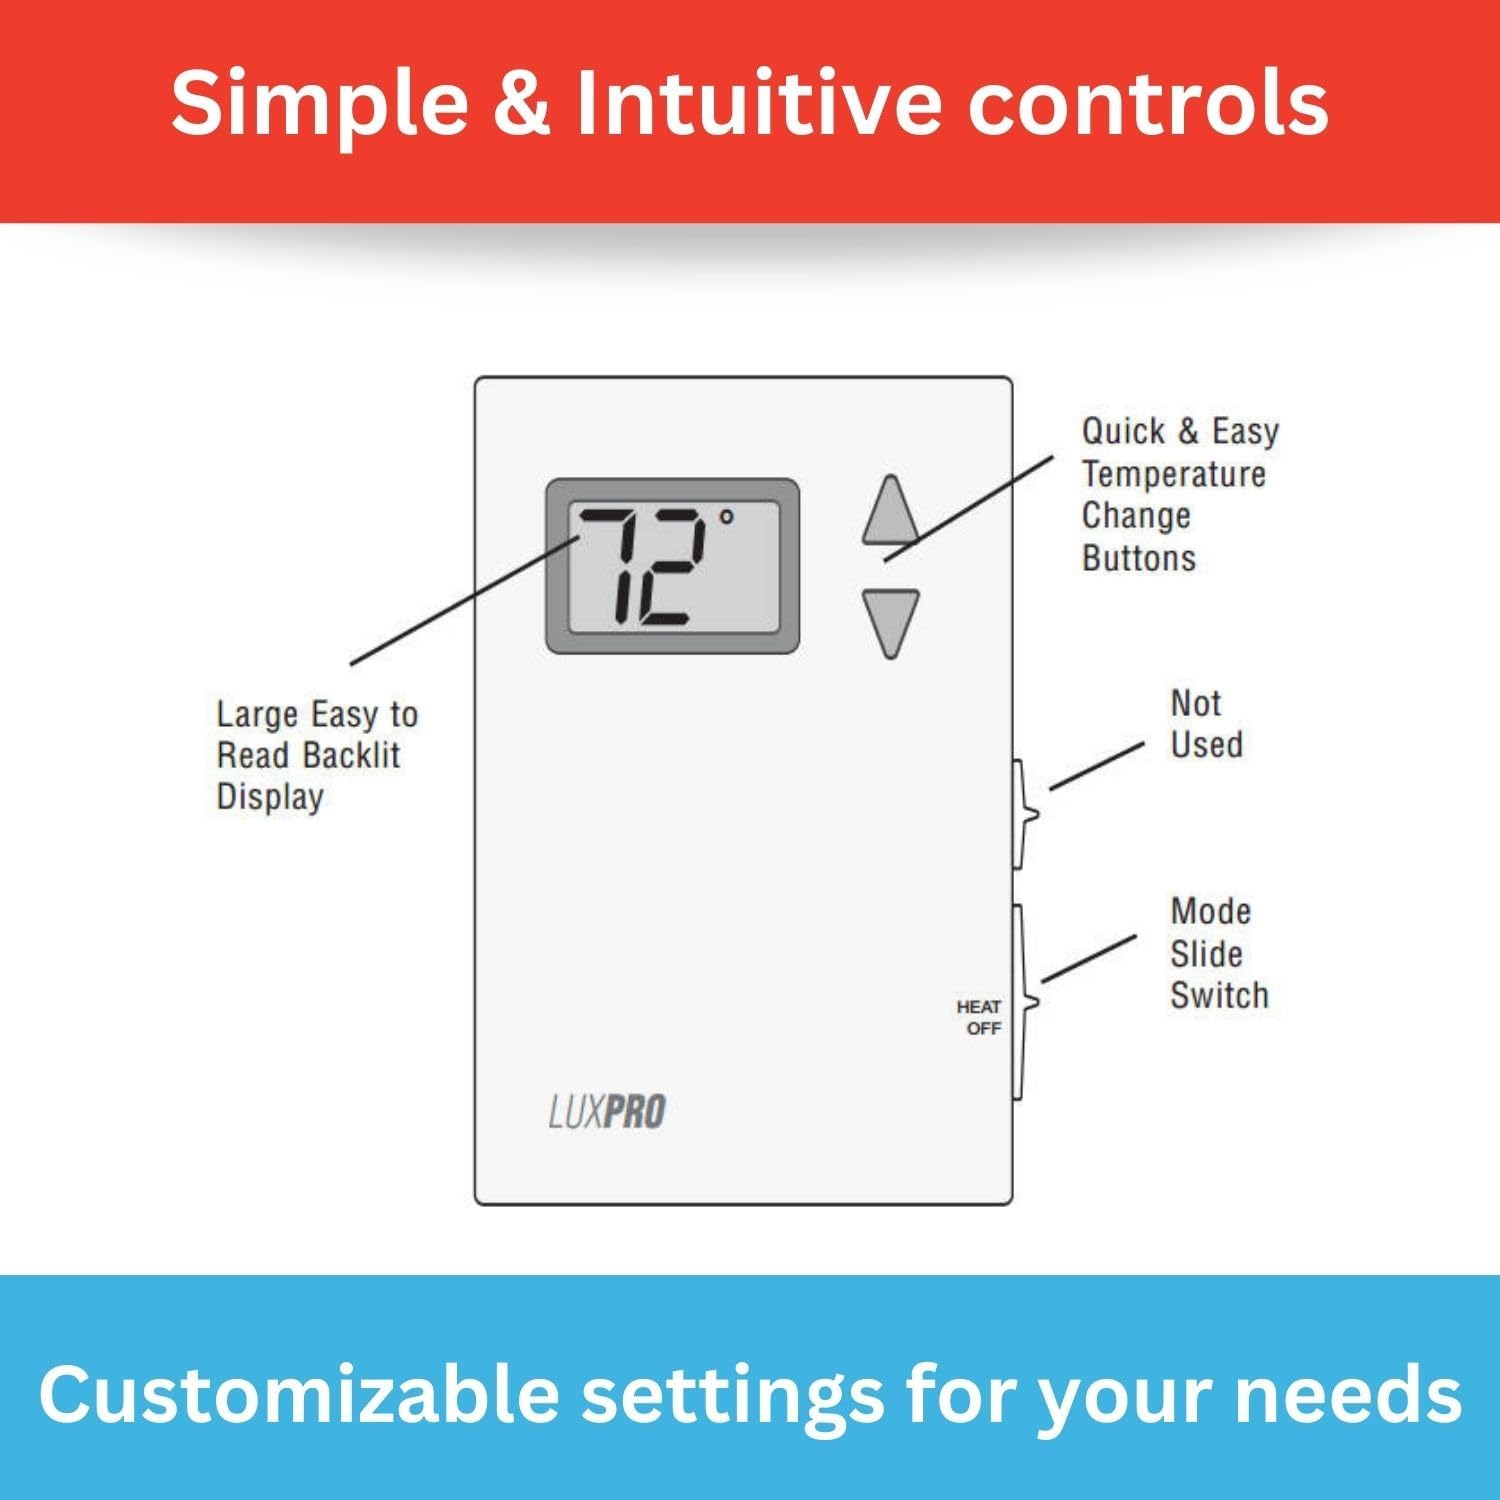
בילד 5.1: Diagram illustrating the controls of the LUX Pro PSD010B Thermostat, highlighting the large backlit display, quick and easy temperature change buttons (up/down arrows), and the Heat/Off mode slide switch on the side.
- דיגיטאַל ווייַז: Shows the current room temperature and the set temperature. It is backlit for easy reading.
- אַרויף/אַראָפּ קנעפּלעך: געניצט צו סטרויערן די געוואונטשענע טעמפּעראַטור איינשטעלונג.
- מאָדע סלייד סוויטש: Located on the side of the thermostat. Select 'HEAT' for heating operation or 'OFF' to turn the system off.
5.2 באַשטעטיקן די טעמפּעראַטור
צו סטרויערן די געוואונטשענע טעמפּעראַטור, ניצט די Up or אַראָפּ arrow buttons. The display will show the set temperature as you adjust it, then revert to showing the current room temperature after a few seconds. The thermostat will automatically activate your heating system when the room temperature falls below your set temperature.
5.3 מאָדע סעלעקציע
Use the slide switch on the side of the thermostat to select the operating mode:
- היץ: The thermostat will control your heating system to maintain the set temperature.
- OFF: The heating system will remain off.
5.4 פאַהרענהעיט / סעלסיוס סעלעקציע
The thermostat allows selection between Fahrenheit and Celsius temperature display. Refer to the detailed specifications or the full manual for instructions on how to switch this setting, typically involving a button combination or a switch on the circuit board.
5.5 Adjustable Temperature Limits
The thermostat features adjustable temperature limits, allowing you to set a minimum and maximum temperature range. This prevents the temperature from being set too high or too low. Consult the full manual for instructions on how to configure these limits.
6. סיסטעם קאָמפּאַטאַביליטי
The LUX Pro PSD010B thermostat is designed for specific heating systems. Please review the compatibility information below before installation.

בילד 6.1: A chart detailing the system compatibility of the LUX Pro PSD010B Thermostat. It is compatible with 2-wire Hydronic (Hot Water), 750 Millivolt, and Gas Fireplaces (24V). It is not compatible with Heat Pump Multistage, Radiant Ceiling Heat, Electric Baseboards, Heat Pump w/ Auxiliary Heat, Portable space heaters, 3-wire Hydronic (Hot Water), Gas/Oil/Electric Furnace - Multistage, Cool Multistage, Cooling only, Plug-in air conditioners, Heat Pump w/o Auxiliary Heat, Gas/Oil/Electric Furnace - Heating only, and Gas/Oil/Electric Furnace - Single Stage.
Compatible Systems (Heat Only - 24V or Millivolt)
- 2-wire Hydronic (Hot Water) systems
- 750 Millivolt systems (e.g., gas fireplaces, floor furnaces)
- Gas Fireplaces (24V)
ניט קאַמפּאַטאַבאַל מיט
- Heat Pump MultistagE סיסטעמס
- Radiant Ceiling Heat
- Electric Baseboards
- היץ פּאָמפּע מיט אַגזיליערי היץ
- Portable space heaters
- 3-wire Hydronic (Hot Water) systems
- Gas/Oil/Electric Furnace - Multistage
- Cool MultistagE סיסטעמס
- Cooling only systems
- Plug-in air conditioners
- היץ פּאָמפּע אָן אַגזיליערי היץ
- Gas/Oil/Electric Furnace - Heating only (if it requires a fan control)
- Gas/Oil/Electric Furnace - Single Stage (if it requires a fan control)
7. וישאַלט
7.1 באַטערי פאַרבייַט
The thermostat is powered by two AA batteries. When the battery power is low, a low battery indicator will appear on the display. Replace batteries annually or when the low battery indicator appears to ensure continuous operation.
- Gently pull the bottom of the thermostat cover forward to release it from the base.
- אַראָפּנעמען די אַלט אַאַ באַטעריז.
- אַרײַנשטעלן צוויי נײַע AA אַלקאַליין באַטעריעס, און זיכער מאַכן אַז די פּאָלאַריטעט איז ריכטיק.
- Snap the cover back onto the thermostat base.
7.2 רייניקונג
רייניקט די אויסערליכע זייט פונעם טערמאסטאט מיט א ווייכן, טרוקענעם שטאָף.amp שטאָף. ניצט נישט קיין שרײַבנדיקע רייניגער אָדער סאָלווענטן. פֿאַרמײַדט צו שפּריצן פֿליסיקייטן גלייך אויף דעם טערמאָסטאַט.
8. טראָובלעשאָאָטינג
| פּראָבלעם | מעגלעך סיבה | לייזונג |
|---|---|---|
| קיין אַרויסווייַז אָדער ליידיק פאַרשטעלן | טויט אָדער ינקערעקטלי אינסטאַלירן באַטעריז | פאַרבייטן די באַטעריעס מיט נייַע AA אַלקאַליין באַטעריעס, און זאָרגט אַז די פּאָלאַריטעט זאָל זיין ריכטיק. |
| Heating system not turning on |
|
|
| אומגענויע טעמפּעראַטור מעסטונג | Thermostat located near heat source/draft, or internal sensor issue. | Ensure thermostat is not exposed to direct sunlight, drafts, or heat sources. If problem persists, contact support. |
9. ספּעסאַפאַקיישאַנז

בילד 9.1: A detailed list of features for the LUX Pro PSD010B Thermostat, including digital, non-programmable operation, battery power, temperature range of 40°F to 90°F, clean design, large backlit display, easy installation, F/C selectable display, 5-minute minimum run/off time, and adjustable temperature stop.
- מאָדעל: PSD010B
- טיפּ: Mechanical, Non-Programmable
- סיסטעם קאַמפּאַטאַבילאַטי: 1 Heat Only (2-wire Hydronic, 750 Millivolt, 24V Gas Fireplaces)
- מאַכט מקור: 2 אַאַ באַטעריז (אַרייַנגערעכנט)
- טעמפּעראַטור קייט: 40°F צו 90°F (4°C צו 32°C)
- ווייַז טיפּ: Digital, Backlit LCD
- קאָנטראָל טיפּ: Button Control (Up/Down arrows), Slide Switch (Heat/Off)
- דימענסיעס: 1.13"ד רענטגענ 5"וו רענטגענ 3.5"ה
- נומער וואָג: 0.4 פונט (6.4 אונסעס)
- Voltage: 24 Volts (compatible with millivolt systems)
- מאַטעריאַל: פּלאַסטיק
- מאַונטינג טיפּ: וואנט בארג
- UPC: 021079070107
10. וואָראַנטי און שטיצן
The LUX Pro PSD010B Thermostat comes with a 5-יאָר לימיטעד וואָראַנטי, ensuring reliable performance and peace of mind. For warranty claims, technical assistance, or further inquiries, please refer to the contact information provided with your product packaging or visit the official LUX webפּלאַץ.

בילד 10.1: The LUX Pro PSD010B Thermostat displayed with icons highlighting its key features: a backlit display, adjustable temperature limits, battery-only power, and a 5-year limited warranty.


