
הקדמה
This manual provides detailed instructions for the installation, operation, and maintenance of your DB DRIVE A3 2250.5 Okur Series A3 Class AB 1000 Watt 5-Channel Ampלייפיער. ביטע ליינט דעם מאַנואַל גרינטלעך איידער איר פּרוּווט אינסטאַלירן אָדער באַדינען עס, כּדי צו זיכער מאַכן ריכטיקן באַנוץ און צו פאַרמייַדן שאָדן צו דער אַפּאַראַט אָדער אייער פאָרמיטל'ס אַודיאָ סיסטעם.
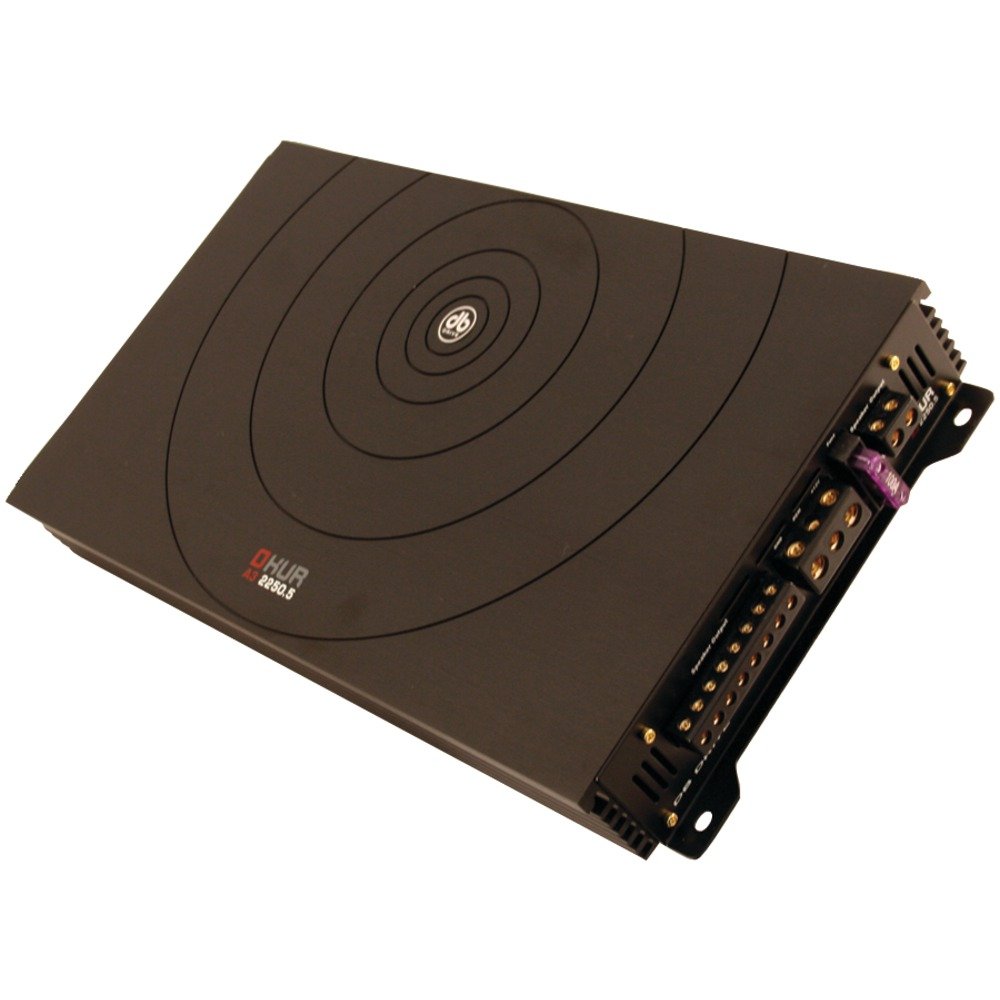
Image: DB DRIVE A3 2250.5 Okur Series A3 Class AB 1000 Watt 5-Channel Ampלײַפֿער. דאָס בילד ווײַזט דעם amplifier's top view, highlighting its compact design and branding.
זיכערקייַט אינפֿאָרמאַציע
שטענדיק אָבסערווירן די פאלגענדע זיכערהייט מיטלען צו פאַרמייַדן שאָדן אָדער שעדיקן:
- Disconnect the vehicle's battery negative terminal before making any power connections.
- זיכער מאַכן אַז אַלע וויירינג איז ריכטיק ראָוטאַד און פארזיכערט צו פאַרמייַדן קניפּן אָדער קורץ קרייזן.
- ניצט צוגעפאסטע וויירינג פאר מאַכט און ערד קאַנעקשאַנז ווי ספּעסיפיצירט אין דער ינסטאַלירונג אָפּטייל.
- ינסטאַלירן די ampדער לופט־ליפֿערער אין אַ לאָקאַציע וואָס ערמעגליכט גענוג ווענטילאַציע צו פאַרמייַדן איבערהיצונג.
- ויסמיידן ינסטאָלינג די amplifier in areas exposed to moisture or excessive vibration.
- באַראַטן זיך מיט אַ פּראָפעסיאָנעלן אויטאָ אַודיאָ אינסטאַללער אויב איר זענט נישט זיכער וועגן קיין טייל פון די אינסטאַלאַציע פּראָצעס.
סעטאַפּ און ינסטאַלירונג
1. אַנפּאַקינג און דורכקוק
קערפאַלי אַראָפּנעמען די amplifier from its packaging. Inspect the unit for any signs of damage that may have occurred during shipping. Contact your dealer immediately if any damage is found.
2. מאָנטירן די Ampליפער
Choose a mounting location that is dry, well-ventilated, and secure. Common locations include under a seat, in the trunk, or behind a panel. Ensure there is sufficient airflow around the amplifier's heatsink.
- מאַרקירט די מאַונטינג לעכער ניצנדיק די ampליפיער ווי אַ מוסטער.
- Drill pilot holes if necessary, being careful not to damage any vehicle components.
- זיכער די ampליפיער ניצנדיק די צוגעשטעלטע מאַונטינג שרויפן.
3. וויירינג קאַנעקשאַנז
Proper wiring is crucial for performance and safety. Refer to the following guidelines:
- Power (BATT+): Connect a heavy-gauge wire (e.g., 4 AWG or 8 AWG depending on total power) directly from the positive terminal of the vehicle's battery. Install an inline fuse holder within 18 inches (45 cm) of the battery.
- ערד (GND): Connect a heavy-gauge wire of the same size as the power wire to a clean, unpainted metal surface of the vehicle's chassis. Ensure a solid, low-resistance connection.
- ווייַט (REM): Connect a smaller gauge wire (e.g., 18 AWG) from the amplifier's remote terminal to the remote output of your head unit. This turns the ampליפיער אויף און אויס מיטן הויפט איינהייט.
- RCA ינפּוץ: Connect RCA cables from your head unit's pre-amp אַוטפּוץ צו די amplifier's RCA input jacks. Ensure correct channel matching (Front L/R, Rear L/R, Sub).
- רעדנער אַוטפּוץ: Connect speaker wires from the amplifier's speaker terminals to your speakers. Observe correct polarity (+ to + and - to -). This is a 5-channel amplifier, typically 4 channels for full-range speakers and 1 channel for a subwoofer.
4. Gain, Crossover, and Bass Boost Settings
These settings allow you to fine-tune the amplifier's output to match your audio system and preferences.
- געווינען קאָנטראָל: Adjust the gain to match the output voltage of your head unit. Start with the gain at minimum, then slowly increase it until you hear distortion, then back off slightly. This is not a volume control.
- Crossover (LPF/HPF):
- נידעריק פאָרן פילטער (LPF): For the subwoofer channel, set the LPF to allow only low frequencies to pass (e.g., 80-120 Hz).
- הויך פּאַס פילטער (HPF): For the full-range channels, set the HPF to block low frequencies from reaching your main speakers (e.g., 80-100 Hz) to prevent distortion and improve sound clarity.
- באַס באָאָסט: Use the bass boost sparingly. Excessive bass boost can lead to distortion and speaker damage. Adjust to taste, ensuring sound remains clear.
אַפּערייטינג ינסטראַקשאַנז
Once installed and configured, the amplifier will power on automatically with your head unit via the remote turn-on wire. Adjust volume and tone controls primarily from your head unit. The amplifier's settings (gain, crossover) are set during installation and generally do not require frequent adjustment.
וישאַלט
The DB DRIVE A3 2250.5 ampדער ליפיער דארף מינימאַלע אויפהאלטונג.
- רייניקונג: Periodically wipe the amplifier's exterior with a soft, dry cloth to remove dust. Do not use harsh chemicals or abrasive cleaners.
- דורכקוק: Occasionally check all wiring connections to ensure they are secure and free from corrosion. Ensure the amplifier's ventilation fins are not obstructed.
טראָובלעשאָאָטינג
אויב איר דערפאַרונג ישוז מיט דיין ampליפיער, זעט די פאלגענדע אלגעמיינע פראבלעמען און לייזונגען:
| פּראָבלעם | מעגלעך סיבה | לייזונג |
|---|---|---|
| קיין מאַכט / Ampליפיער טוט נישט קער אויף |
|
|
| קיין סאָונד רעזולטאַט |
|
|
| פאַרקרימט סאָונד |
|
|
| Amplifier Overheating (Protection Mode) |
|
|
ספּעסאַפאַקיישאַנז
| שטריך | דעטאַל |
|---|---|
| מאָדעל נומער | A3 2250.5 |
| מאַקסימום מאַכט רעזולטאַט | 1000 וואטס |
| טשאַנאַלז | 5-Channel (4 stereo, 1 mono for subwoofer) |
| Ampליפיער קלאַס | קלאַס AB |
| קאַמפּאָונאַנץ | Audiophile Grade |
| דימענסיעס (L X W X H) | 53.59 X 30.48 X 10.92 סענטימעטער |
| וואָג | 6.53 קג |
| היץ מאַנאַגעמענט | DRIVESINK (Okur Series A3 feature) |
וואָראַנטי און שטיצן
DB Drive products are designed for reliability and performance. This product is covered by a limited warranty. Please refer to the warranty card included with your product or visit the official DB Drive webזייטל פֿאַר דעטאַלירטע וואָראַנטי טערמינען און באדינגונגען.
For technical support, service, or warranty claims, please contact your authorized DB Drive dealer or visit the DB Drive official webזייטל פֿאַר קאָנטאַקט אינפֿאָרמאַציע און שטיצע רעסורסן.