
1. הקדמה
This manual provides detailed instructions for the proper installation, operation, and maintenance of your Lanzar VIBE211 Vibe 360 Watt 2 Channel Mosfet Ampליפיער. ביטע ליינט דעם מאַנואַל גרינטלעך איידער איר פּרוּווט צו ינסטאַלירן אָדער אַפּערירן דעם ampליפיער צו ענשור אָפּטימאַל פאָרשטעלונג און זיכערקייט.
2. זיכערקייַט אינפֿאָרמאַציע
שטענדיק אָבסערווירן די פאלגענדע זיכערהייט מיטלען בעת ינסטאַלירונג און אָפּעראַציע:
- Disconnect the vehicle's negative battery terminal before any wiring connections are made.
- זיכער מאַכן אַז אַלע וויירינג איז ריכטיק ראָוטאַד און סיקיורד צו פאַרמייַדן שאָדן אָדער קורץ קרייזן.
- ניצט צוגעפאסטע וויירינג פאר מאַכט און ערד קאַנעקשאַנז ווי ספּעסיפיצירט אין דער ינסטאַלירונג אָפּטייל.
- בארג די ampדער ליפיער זיכער אין א פלאץ וואס ערלויבט גענוג ווענטילאציע און איז באשיצט פון פייכטקייט און איבעריגע היץ.
- דו זאלסט נישט אַרבעטן די ampאויב עס איז געשעדיגט אדער נישט גוט ארבעט. זעט דעם פראבלעם-לייזונג סעקציע אדער זוכט פראפעסיאנעלע הילף.
3. פּראָדוקט איבערview
The Lanzar VIBE211 is a 2-channel Mosfet amplifier designed for car audio systems. It features a bridgeable design, allowing for flexible configuration, and incorporates a regulated Mosfet power supply for stable performance. Key features include variable high/low pass crossover controls and a remote subwoofer bass control.
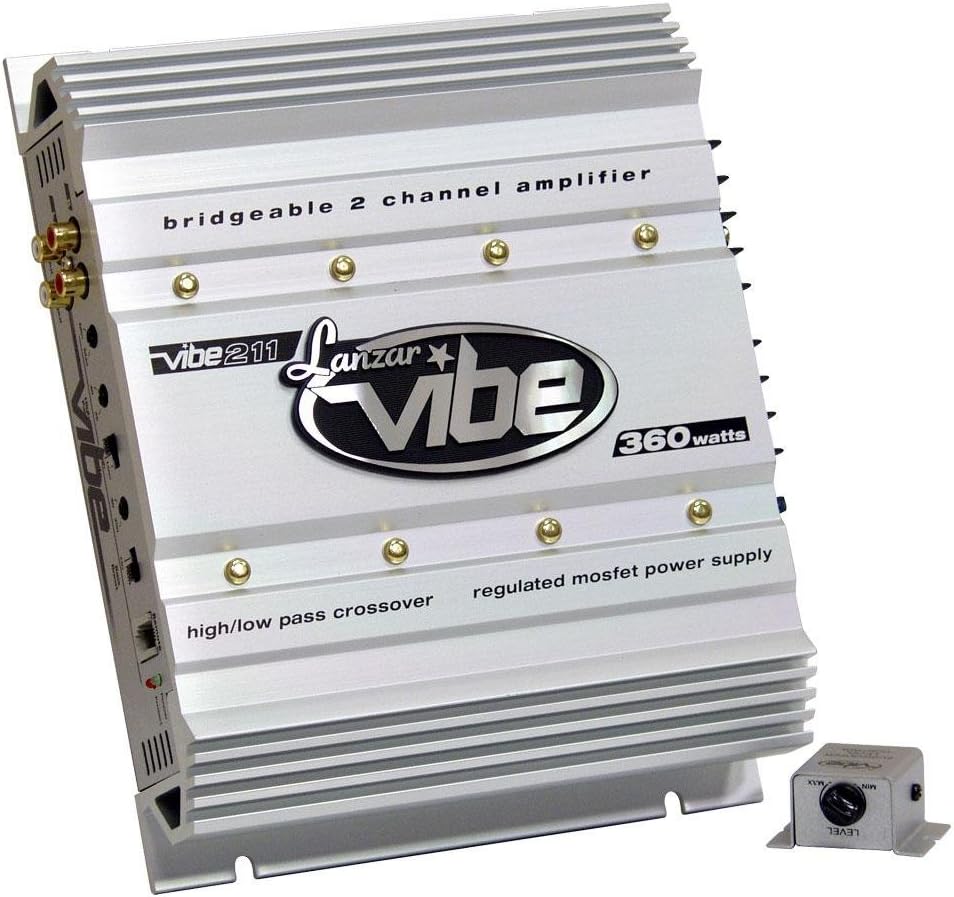
אַ ווינקלדיק view of the silver Lanzar VIBE211 Vibe 360 Watt 2 Channel Mosfet Ampלײַכטער, ווײַזןasing its finned heatsink design, RCA inputs, and control panel. The amplifier features text indicating 'bridgeable 2 channel amplifier', 'vibe 211', 'Lanzar vibe', '360 watts', 'high/low pass crossover', and 'regulated mosfet power supply'. A small, separate remote bass level control unit is visible in the foreground.
4. סעטאַפּ און ייַנמאָנטירונג
4.1 מאָנטירן די Ampליפער
Choose a secure mounting location that provides adequate air circulation around the amplifier's heatsink. Avoid mounting in direct sunlight or areas prone to moisture. Use the provided mounting hardware to secure the ampלייגט פעסט צו א האַרטער ייבערפלאַך.
4.2 וויירינג קאַנעקשאַנז
Ensure all connections are tight and properly insulated to prevent short circuits.
- Power (B+): Connect a heavy-gauge wire (e.g., 8 AWG or larger) directly from the positive terminal of the vehicle's battery to the amplifier's B+ terminal. Install an appropriate fuse (15A) within 18 inches of the battery.
- ערד (GND): Connect a heavy-gauge wire of the same size as the power wire from the amplifier's GND terminal to a clean, unpainted metal surface of the vehicle chassis. Ensure a good electrical connection.
- ווייַט (REM): Connect a smaller gauge wire (e.g., 18 AWG) from the amplifier's REM terminal to the remote turn-on output of your head unit. This wire turns the amplifier on and off with your stereo.
- RCA ינפּוץ: Connect the RCA audio cables from your head unit's pre-amp אַוטפּוץ צו די amplifier's Gold RCA Inputs. The amplifier includes Line Outs for Left and Right Channels for daisy-chaining to other ampליפערז.
- רעדנער אַוטפּוץ: Connect your speakers to the amplifier's speaker terminals. Observe correct polarity (+ to + and - to -). The amplifier is 2 Ohm stereo stable and bridgeable at 4 Ohms.
- Remote Subwoofer Bass Control: Connect the remote bass control unit to the designated port on the amplifier. Mount the control unit in an accessible location for easy adjustment.
5. אַפּערייטינג ינסטרוקטיאָנס
5.1 ערשט מאַכט-אַרויף
After all connections are made, reconnect the vehicle's negative battery terminal. Turn on your head unit. The amplifier features Soft Turn On/Off circuitry to prevent pops and clicks. Power Protection LED Indicators will illuminate to show operational status.
5.2 Adjusting Input Level Controls
די amplifier has Variable Input Level Controls. Start with the amplifier's input level set to minimum. Play a familiar piece of music through your head unit at about 75% of its maximum volume. Slowly increase the amplifier's input level until you hear slight distortion, then back it off slightly. This ensures the amplifier receives an optimal signal without clipping.
5.3 קראָסאָוווער סעטטינגס
די amplifier features Variable High Low Pass Crossover Controls. These allow you to filter specific frequencies to your speakers or subwoofers.
- הויך פּאַס פילטער (HPF): Used for full-range speakers to prevent low frequencies from reaching them, improving clarity.
- נידעריק פאָרן פילטער (LPF): Used for subwoofers to allow only low frequencies to pass, enhancing bass response.
Adjust these controls to match the frequency response characteristics of your speakers and subwoofers.
5.4 Bass Boost Circuit
The built-in Bass Boost Circuit allows for an increase in bass output at specific frequencies. Use this feature sparingly and adjust to your preference, avoiding excessive boosting that could lead to distortion or speaker damage.
5.5 ברידזשד מאָדע אָפּעראַציע
די amplifier can be bridged at 4 Ohms to combine the power of both channels into a single, higher-power output, typically for driving a subwoofer. Refer to the wiring diagram for specific instructions on bridging the ampליפער.
6. וישאַלט
The Lanzar VIBE211 amplifier requires minimal maintenance. Periodically inspect the wiring connections for tightness and corrosion. Keep the amplifier's heatsink clean and free of dust or debris to ensure proper cooling. Use a soft, dry cloth for cleaning the exterior.
7. טראָובלעשאָאָטינג
אויב איר דערפאַרונג ישוז מיט דיין amplifier, consult the following table before seeking professional service:
| פּראָבלעם | מעגלעך סיבה | לייזונג |
|---|---|---|
| קיין מאַכט / קיין געזונט | Blown fuse; Loose power/ground/remote wire; Faulty head unit. | Check and replace fuse; Verify all power, ground, and remote connections; Test head unit functionality. |
| פאַרקרימט סאָונד | Input level too high; Speaker impedance too low; Damaged speakers. | Adjust input level; Verify speaker impedance (2 Ohm stereo stable, 4 Ohm bridged); Inspect speakers for damage. |
| Amplifier Goes into Protection Mode | איבערהיצונג; קורץ קרייז אין רעדנער וויירינג; נידעריק וואָלומעןtage. | Ensure adequate ventilation; Check speaker wires for shorts; Verify battery voltage און טשאַרדזשינג סיסטעם. |
| No Bass from Subwoofer | LPF not enabled or set too high; Phase issue; Remote bass control set to minimum. | Adjust LPF setting; Check subwoofer phase; Increase remote bass control level. |
8. ספּעסאַפאַקיישאַנז
Technical specifications for the Lanzar VIBE211 ampלייבער:
- Power Output (RMS @ 4 Ohms): 2 רענטגענ 90 וואטס
- Power Output (Max @ 4 Ohms): 2 רענטגענ 180 וואטס
- Power Output (Max Bridged @ 4 Ohms): 1 רענטגענ 360 וואטס
- Power Output (RMS @ 2 Ohms): 2 רענטגענ 150 וואטס
- Ampליבער טיפּ: 2 Channel Mosfet
- אָפטקייַט ענטפער: 15 Hz - 35 kHz
- סיגנאַל-צו-ראַש פאַרהעלטעניש (S/N): 90 דב
- קאָריק רייטינג: קסנומקסאַ
- דימענשאַנז (B x H x L)גרייס: 10.25 אינטשעס רענטגענ 2 אינטשעס רענטגענ 8 אינטשעס
- אַרייַנשרייַב לעוועל קאָנטראָלס: וואַריאַבלע
- קראָססאָווער קאָנטראָלס: Variable High/Low Pass
- פעסטקייַט: 2 Ohm Stereo Stable, Bridgeable at 4 Ohms
- שוץ סירקוטרי: Advanced Power Protection LED Indicators
- נאָך פֿעיִקייטן: Remote Subwoofer Bass Control, Electronic Crossover Network, Bass Boost Circuit, Soft Turn On/Off
9. וואָראַנטי און שטיצן
9.1 וואָראַנטי אינפֿאָרמאַציע
The Lanzar VIBE211 ampליפיער קומט מיט א 1-יאָר limited warranty from the date of purchase. This warranty covers defects in materials and workmanship under normal use. Please retain your proof of purchase for warranty claims. The warranty does not cover damage caused by improper installation, accident, misuse, abuse, negligence, or unauthorized modification.
9.2 קונה שטיצן
For technical assistance, troubleshooting beyond this manual, or warranty service, please contact Lanzar customer support. Refer to the official Lanzar webזייטל אדער פּראָדוקט פּאַקאַדזשינג פֿאַר איצטיקע קאָנטאַקט אינפֿאָרמאַציע.